then write your review
iCareFone - Free iOS Backup tool & Easy Data Manager
Backup/Transfer/Restore/Manage iOS Data with Simple Clicks
Backup/Manage iOS Data Easily
Backup/Manage iOS Data in Clicks
So, you’ve spent hours creating a killer playlist on your iPod and want to copy it to iTunes. That’s fair enough — who wouldn’t want to have their precious playlists on every device they own. As any Apple user would, you might have tried to drag and drop the playlist from your iPod to your computer in iTunes. But you failed, didn’t you? Don’t worry, I’ve got you covered.
You can’t simply drag and drop to transfer playlists from iPod to iTunes, but there are other ways to do it. In this article, I’m going to explain the top 5 of them. So, sit tight and read on.
Although drag and drop wouldn’t work, you can still use iTunes to transfer playlists from iPod to iTunes on pc. Follow the below-mentioned steps to do it.
Go to “File”, then “Libray”, and hit “Import Playlist…” — then select the text file you created in the previous steps.
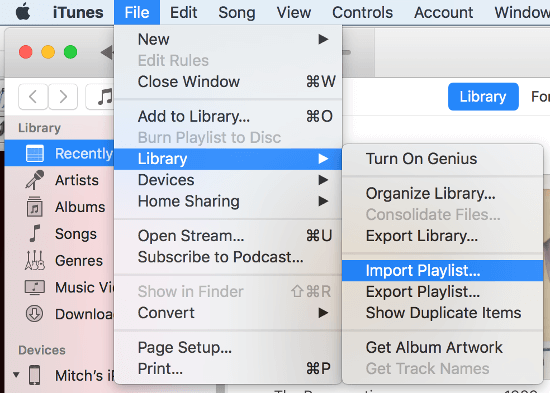
If you follow the steps right, your playlist should be copied and ready at this point.
If you have multiple playlists to copy, you have to repeat the same step-by-step process for each playlist. I know this is not the easiest process ever; that’s why I have included some easier methods in the next section.
Here we will list some third-party tools that can transfer playlist from iPod to iTunes with only several steps. You can use them to transfer playlist from iPod to iTunes without iTunes.
Tenorshare iCareFone is arguably the best tool to easily copy playlists from iPod to iTunes library. And unlike iTunes, working with Tenorshare iCareFone is incredibly easy. You can transfer playlists to your computer with minimum effort without having to create text files as you do in iTunes.
Follow the below-mentioned steps to transfer your playlists using Tenorshare iCareFone.
Connect your iPod to the computer using a data cable. Unlock your iPod and select “Trust This Computer” to allow Tenorshare iCareFone to do its magic. Open Tenorshare iCareFone and select “Transfer Device Media to iTunes” from the Quick Start menu on the right-hand side.
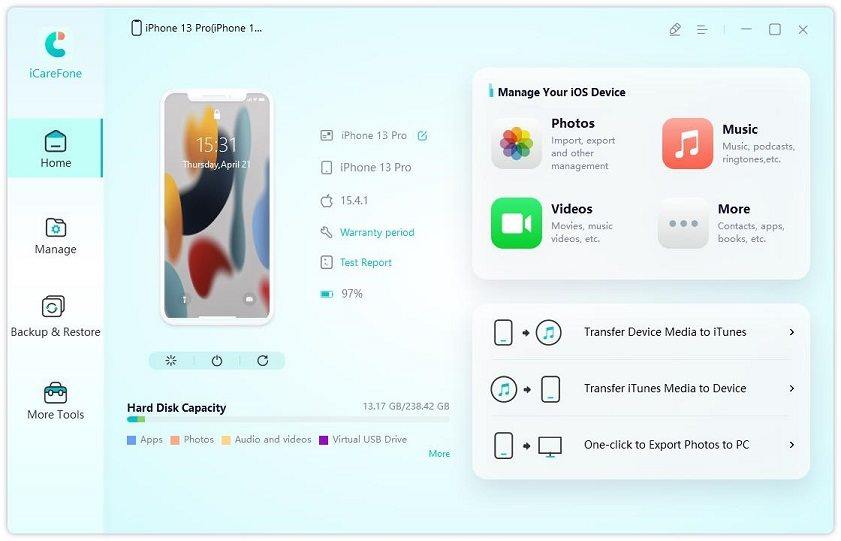
You have the option to select different types of media to copy, but as we’re only looking to copy your music playlists, only keep the “Music” category and uncheck all the others.
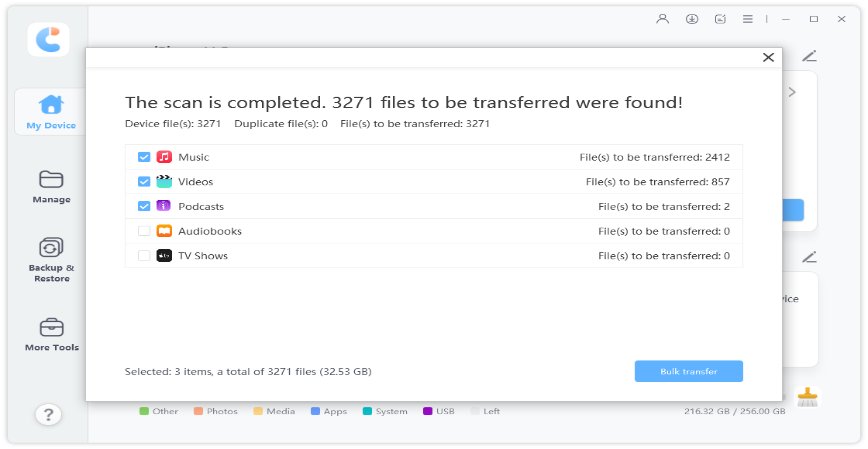
Click the “Transfer” button and the magic begins. Tenorshare iCareFone will automatically transfer all your music playlists from your device to the computer.
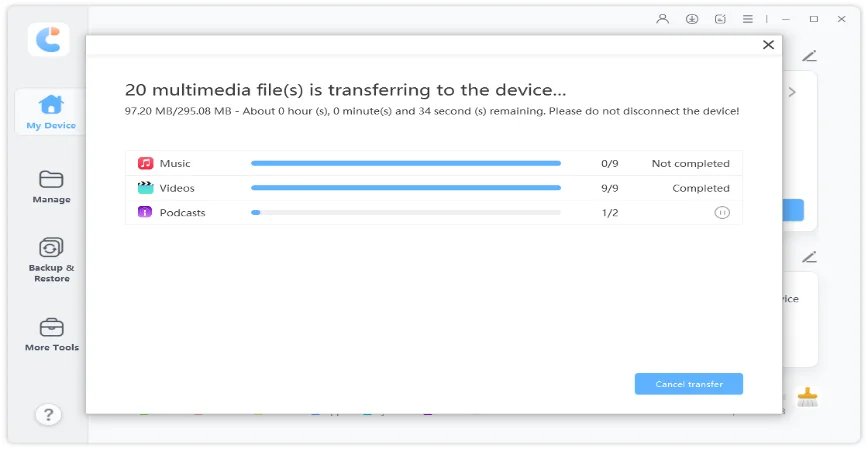
You can use the same method to transfer any type of media from any of your Apple devices like your iPhone and iPad. Alternatively, you can also go the other way around and transfer playlists from iTunes to your iPod.
Tenorshare iCareFone is also a great application if you want to take a backup of your device to prepare it for the upcoming iOS 15 update. Furthermore, if you’re planning to get iPhone 13, you can backup your existing iPhone using Tenorshare iCareFone.
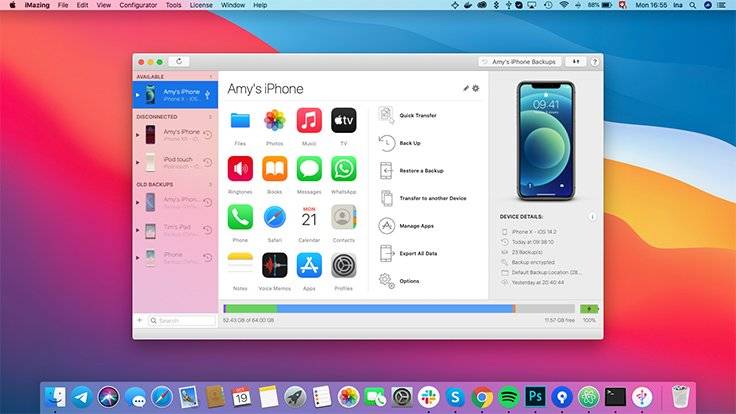
iMazing is another one of the simple tools to backup and restore your data and media files. And of course, you can use it to transfer playlists from iPod to iTunes on pc. To get started you have to download the application from its website. Follow the installation procedure and you should have it ready in no time.
Run the application and copy your iPod’s music playlist to your pc. You can either do that using your data cable or wirelessly. Note that you don’t need to work around iCloud or iTunes to transfer wirelessly — the service works without them.
iMazing is not flawless, though. Sometimes, you may feel issues if you’re trying to backup and restore your Books data. Furthermore, the photos are read-only and you can’t edit their information.
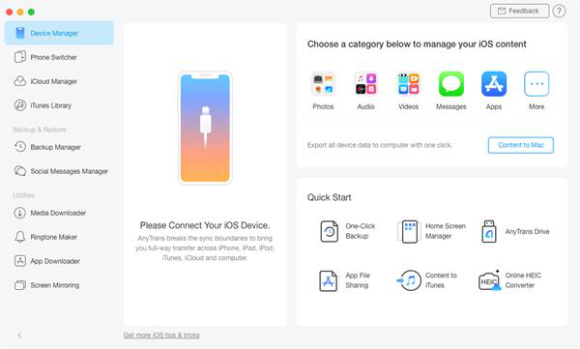
AnyTrans is another one of the numerous programs that can seamlessly copy playlists from iPod to iTunes. Plus, you can also use it to transfer other types of data between your Apple devices and computer with relative ease.
Setting up AnyTrans is exactly how you set up other Apple device data transfer software. Download the official program from the website, follow the installation instructions, and you’re good to go.
However, there are some downsides to AnyTrans as well. For one, the pricing may not be suitable for everyone. For $39.99 per year, you can find other alternatives on the market that work better. What’s more? You can’t add to or edit your existing iTunes library with AnyTrans — it only works well for managing files stored locally in your devices.
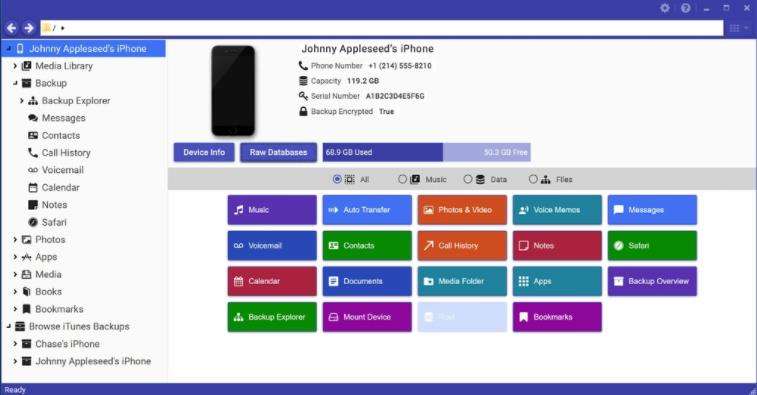
Alternatively, you can also use iExplorer to transfer your playlists from iPod to iTunes. Download the application from the official site and connect your iPod to the computer using a data cable.
Trust the computer and open the iExplorer application. On the Media Library page, click “Auto Transfer” and from there, you should be able to transfer your playlists in no time.
Users, however, report a few issues with iExplorer. For one, the free version of the application has loads of ad popups — you see one as soon as you open up the application. Furthermore, users often complain about iExplorer crashing and closing randomly.
There are numerous ways you can adapt to copy your music playlists from iPod to iTunes. However, not all of them are made equal. This article discusses the top methods you should use to do this job.
then write your review
Leave a Comment
Create your review for Tenorshare articles
By Jenefey Aaron
2025-04-17 / iPod Tips
Rate now!